Many websites and applications require databases to store and manage large sets of information. MySQL and MariaDB are popular database management systems because of their flexibility, power, and ubiquity.
For many users, managing databases is difficult from the command line. For those who prefer to use a web interface, phpMyAdmin is a great alternative to command driven management.
In this guide, we will cover how to install and configure phpMyAdmin on a CentOS 6.4 VPS. The procedure should be fairly similar for other versions.
Step One –– Add EPEL Repositories
The phpMyAdmin package is not included in the CentOS default repositories, but it is available in the Fedora Projects EPEL (Extra Packages for Enterprise Linux) repositories.
We can add the repository to our yum source list by downloading a configuration file from the repository itself. Run the following command:
cd ~
wget http://download.fedoraproject.org/pub/epel/6/x86_64/epel-release-6-8.noarch.rpm
Note that even though this file is coming from the 64 bit repository, it is architecture agnostic, meaning it will work for either 32 bit or 64 bit installations.
This will download the package into our home directory. Install it by typing:
sudo rpm -ivh epel-release*
Your installation now is aware of the EPEL repositories and will query it for packages.
We can check this by typing:
yum repolist
. . .
repo id         repo name                                       status
base            CentOS-6 - Base                                 6381
epel            Extra Packages for Enterprise Linux 6 - x86_64  9788
extras          CentOS-6 - Extras                                 13
updates         CentOS-6 - Updates                              1336
repolist: 17518
As you can see, the EPEL repo is present.
Since the repository is entered in the system now, you can remove the repository configuration package by typing:
rm epel-release*
Step Two –– Download and Configure MySQL
To use phpMyAdmin, you need database software to administer. We will install MySQL and preform some initial configuration from the command line.
To install it, simply type:
sudo yum install mysql-server
Upon installation, MySQL does not start automatically. We can start it manually by typing:
sudo service mysqld start
We can configure some necessary directory structures and create some management system tables with the following command:
sudo mysql_install_db
Afterwards, we can harden our installation a bit by changing some dangerous defaults. There is a provided script that will walk us through this:
sudo mysql_secure_installation
You will be asked a number of questions:
- Enter current password for root: press Enter
- Set root password? Y
- New password: Type an administrative password here
- Re-enter new password: Confirm the password
- Remove anonymous users? Y
- Disallow root login remotely? Y
- Remove test database and access to it? Y
- Reload privilege tables now? Y
Your MySQL installation should be up and running. Test that you can log in with the password you set by typing:
mysql -u root -p
Enter password:
Supply the password you have just set. You will be given a MySQL prompt.
Type exit to return to the shell prompt:
exit
Step Three –– Download phpMyAdmin
We are finally ready to install and configure phpMyAdmin. This will pull in the required dependencies, including a web server to handle the administration interface.
Type:
sudo yum install phpmyadmin
You may be asked to confirm once or twice, and then the packages will be downloaded and installed.
Step Four –– Configure phpMyAdmin
The Apache web server was installed when we pulled in phpMyAdmin if it wasn’t already on the system. We need to configure a few items with this.
For security purposes, we should lock down access to the phpMyAdmin interface to a specific IP address.
Find Your IP Address
You will need to know the IP address of the computer you plan on using to access your databases. This is a security precaution so that unauthorized people cannot connect.
Note: This is the not the IP address of your VPS, it is the IP address of your home or work computer.
You can find out how the greater web sees your IP address by visiting one of these sites in your web browser:
Compare a few different sites and make sure they all give you the same value. Write this down.
Configure Apache Files
The phpMyAdmin package installs an Apache Virtual Host file that is used to configure web access. Open the file with the following command:
sudo nano /etc/httpd/conf.d/phpMyAdmin.conf
By default, this configuration only allows access from the same computer that is hosting the software. Because the databases, web server, and administration software are hosted on a VPS instead of your home computer, we will have to adjust these values.
This is where the IP information about your home computer comes in handy. We will change every reference to 127.0.0.1 with the IP address you found.
There should be four locations that you need to change:
. . .
Require ip your_workstation_IP_address
. . .
Allow from your_workstation_IP_address
. . .
Require ip your_workstation_IP_address
. . .
Allow from your_workstation_IP_address
. . .
Save and close the file.
You need to start the server with the following command:
sudo service httpd start
Step Five –– See the Results!
Your interface should now be configured and ready to access.
Point your web browser to your VPS IP address followed by “/phpmyadmin”
VPS_IP_address/phpmyadmin
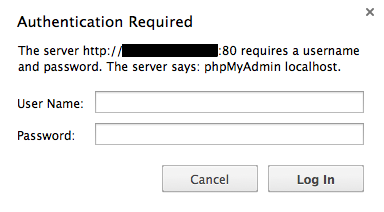
You will be asked to log in. Use the user root and the password that you selected during the MySQL configuration stage.
After you provide the requested credentials, you will have access to the phpMyAdmin interface:
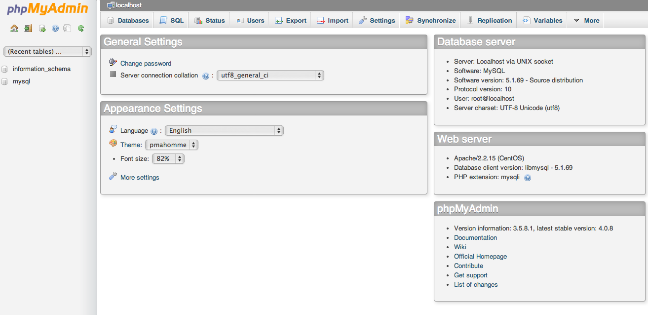
Congratulations, you can now begin managing your database software from the web interface!
Sumber : https://www.digitalocean.com/community/tutorials/how-to-install-and-secure-phpmyadmin-on-a-centos-6-4-vps